
Introduction: Why I Made the Change
For several years, my home network relied on a UniFi Dream Machine (UDM) Base paired with a couple of UniFi BeaconHD devices for mesh Wi-Fi coverage. Originally, I wanted to manage my own network and have multiple Wi-Fi networks, which limited my choice to prosumer-level equipment from brands like Ubiquiti or TP-Link. After some research, I settled on the UDM Base and BeaconHD about four years ago.
While this setup worked well initially, the ever-increasing number of devices—over 100 IoT devices, streaming clients, PCs, and mobile devices—revealed its limitations. Network congestion, coverage inconsistencies, and limited control were becoming issues I couldn’t ignore.
Another key factor in my decision to upgrade was that the UDM Base didn’t support Wi-Fi 6. With more modern devices supporting this standard, I wanted a network capable of handling higher speeds and more simultaneous connections. Wi-Fi 6 also promises better coverage, performance, and improved battery usage for devices running on both 2.4 GHz and 5 GHz bands, which was another major consideration. This prompted my move to OPNsense as my router and firewall solution, along with UniFi U6 access points for Wi-Fi.
My Previous Setup: UDM Base with BeaconHD
The UDM Base with BeaconHD mesh extenders provided decent Wi-Fi coverage for my three-level, 3000-square-foot home. The BeaconHD units helped eliminate dead spots, but as my network expanded—especially with over 100 IoT devices running on the 2.4 GHz band—the setup began to show its limitations.
Additionally, with the increasing number of Wi-Fi 6 devices in my household, the lack of support for Wi-Fi 6 on the UDM Base became a bottleneck. This was especially noticeable when multiple devices demanded high-bandwidth activities like streaming 4K video or gaming.
Why I Chose OPNsense
After considering various options, I chose OPNsense as my next firewall/router solution. OPNsense is a powerful, open-source platform with features that give me more granular control over my network, from VLAN segmentation to advanced firewall rules. It’s ideal for someone like me who enjoys tinkering and fine-tuning their network for optimal performance.
Virtualized Setup: OPNsense and UniFi Network Server on Proxmox
To make the most of my hardware, I decided to virtualize both OPNsense and UniFi Network Server using Proxmox. The Proxmox server runs on an N5105-based NUC with 16GB of RAM and 4 network ports (Intel, not Realtek). I have dedicated ports for the network server and separate ports for OPNsense’s LAN and WAN connections, which ensures that each service has its own dedicated connection.
Here’s what this setup offers:
• Resource Optimization: OPNsense and UniFi Network Server are lightweight enough to run smoothly on the NUC, even with multiple VLANs and numerous connected devices.
• Snapshotting and Backup: Virtualizing on Proxmox allows for easy snapshots and backups of my VMs, providing a safety net in case something goes wrong.
• Flexible Resource Allocation: I can dynamically adjust CPU, RAM, and storage allocations for both OPNsense and UniFi as my network demands grow.
• Dedicated Network Ports: With dedicated ports for the network server and for OPNsense’s LAN and WAN, I can keep traffic isolated and ensure optimal bandwidth for each service.
This approach has allowed me to consolidate my network services, optimize resource usage, and enjoy the flexibility to adjust configurations as needed.
The New Setup: UniFi U6 APs
For Wi-Fi, I upgraded to UniFi U6 access points to improve both coverage and performance, and importantly, to add Wi-Fi 6 support to my network. These APs offer greater bandwidth and can handle the demands of modern devices, such as streaming 4K content, gaming, and IoT traffic, all while maintaining high performance across the entire network.
Wi-Fi 6 brings several key benefits, including:
• Better coverage and signal strength across both 2.4 GHz and 5 GHz bands.
• Improved performance in dense environments, where multiple devices are connected simultaneously.
• Reduced battery consumption for Wi-Fi 6-compatible devices, leading to longer battery life for smartphones, tablets, and IoT devices.
I strategically placed the U6 APs on each main floor of my home and connected them using wired Ethernet backhaul for maximum stability and speed. This has effectively eliminated the performance limitations I experienced with the previous mesh setup, providing a more robust Wi-Fi experience across all levels of my home.
Configuring VLANs and Network Segmentation
One of the primary reasons for switching to OPNsense was to improve how I handle traffic within my network. With OPNsense, I configured VLANs to separate different types of devices, ensuring both security and optimal performance:
• VLAN 10: Trusted devices like PCs, phones, and laptops.
• VLAN 20: Home IT infrastructure (e.g., access points, switches).
• VLAN 30: Streaming devices, such as smart TVs and speakers.
• VLAN 48: IoT devices like smart lights, sensors, and cameras.
• VLAN 99: Guest network for visitors.
By using VLANs, I’ve segmented the network in a way that allows for better management of bandwidth and adds a layer of security between device groups. Each VLAN can have its own firewall rules, further enhancing control.
Managing Wi-Fi APs and Switches with UniFi Network Server
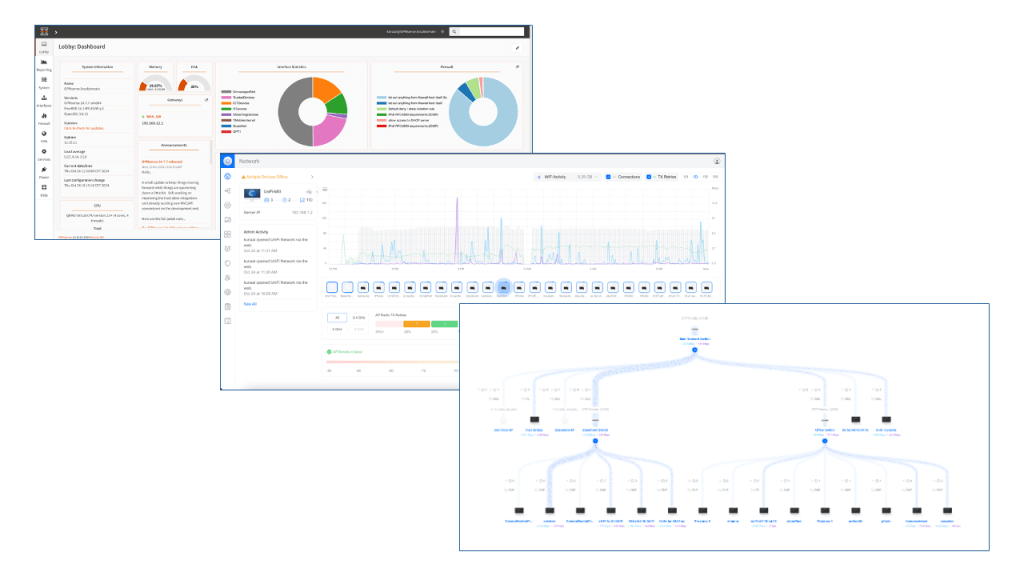
To manage the UniFi U6 APs and my switches, I installed the UniFi Network Server on my Proxmox machine. This setup provides a centralized interface for monitoring, configuring, and updating all UniFi devices in my network. With the UniFi Network Server, I can:
• Monitor the health and performance of connected devices.
• Make adjustments to Wi-Fi settings (e.g., channels, power output).
• Apply firmware updates to all UniFi devices from a single dashboard.
This centralized management has made it easy to keep my network running smoothly, and I can monitor everything remotely when needed.
Mesh Networking vs. Wired Backhaul
In my previous setup, I relied on the BeaconHD for mesh networking, which worked well for extending coverage but introduced some bandwidth and latency constraints, especially when handling multiple devices.
With the new U6 APs and wired Ethernet backhaul, those issues have been resolved. Wired backhaul ensures that each AP has access to the full network bandwidth without relying on wireless connections between extenders. The result is a more stable, faster Wi-Fi experience, even when many devices are connected.
Performance Improvements
Since upgrading to OPNsense and UniFi U6 APs, the performance improvements have been significant. The network is now faster, more responsive, and far more stable across the board. Some key improvements include:
• Wi-Fi 6 Support: Modern devices now get the full benefit of Wi-Fi 6, with faster speeds, better coverage, and improved battery life.
• Coverage: There are no dead zones, and I get consistent speeds throughout the house.
• Speed: 4K streaming, gaming, and IoT automation are smoother and faster.
• Device Management: With over 100 IoT devices and multiple users, the network handles congestion far better than before.
Challenges and Tips
The transition from UDM to OPNsense wasn’t entirely smooth, but the benefits far outweigh the challenges. A few lessons I learned:
1. VLAN Planning is Key: Plan your VLAN structure carefully before setting it up. This will make managing devices across different networks much easier.
2. Use Wired Backhaul for Stability: If possible, use Ethernet backhaul for your access points. It makes a noticeable difference in performance.
3. Snapshot and Backup Regularly: If you’re virtualizing, make sure to regularly snapshot and back up your VMs to avoid any major setbacks.
Conclusion: Final Thoughts
The shift from a UDM Base and BeaconHD mesh to OPNsense with UniFi U6 APs has transformed my home network. I now have full control, better performance, and more flexibility to handle the growing number of devices in my home.
If you’re finding your current all-in-one router struggling with your needs, I highly recommend considering a switch to OPNsense, especially if you enjoy the control and customization that comes with it. Pairing it with UniFi APs ensures a reliable, high-performance Wi-Fi network that can scale as your household’s demands grow.


