
Setting Up Chromium in Kiosk Mode to Run a Home Assistant Dashboard on a Touchscreen Device (Debian)
I’ve recently gone through the process of setting up a touchscreen device to run my Home Assistant dashboard in kiosk mode on Debian, and I wanted to share the steps I took to get it up and running smoothly. To make the process easier for anyone looking to do the same, I’ve created a script that automates most of the setup, including turning off the mouse pointer and configuring Chromium to launch in full-screen kiosk mode.
Choosing Chromium for Kiosk Mode
I’ve been trying different ways to display my Home Assistant dashboard, and after trying a few different approaches (including cheap android tablets and browsers like Fully), I found that the best solution was to use a dedicated touchscreen device with Chromium running in kiosk mode on Debian. This setup offers a clean, full-screen interface that loads the dashboard automatically and eliminates the need for any unnecessary browser UI.
Benefits:
- Fullscreen, distraction-free view of my Home Assistant dashboard.
- Automatic startup: Chromium launches as soon as the device boots up.
- Touchscreen support: Works perfectly for my touch-based interactions.
- No mouse pointer: Since it’s a touchscreen, the script turns it off automatically.
My Setup:
- Debian-based system: I started by installing Debian 12 (Bookworm) on a Mele PCG02 with an N4000 CPU and 4GB RAM. Since I didn’t need a graphical desktop environment for this project, I opted to install Debian without it. During the installation, I only selected SSH and Standard Utilities, keeping the system as lightweight as possible.
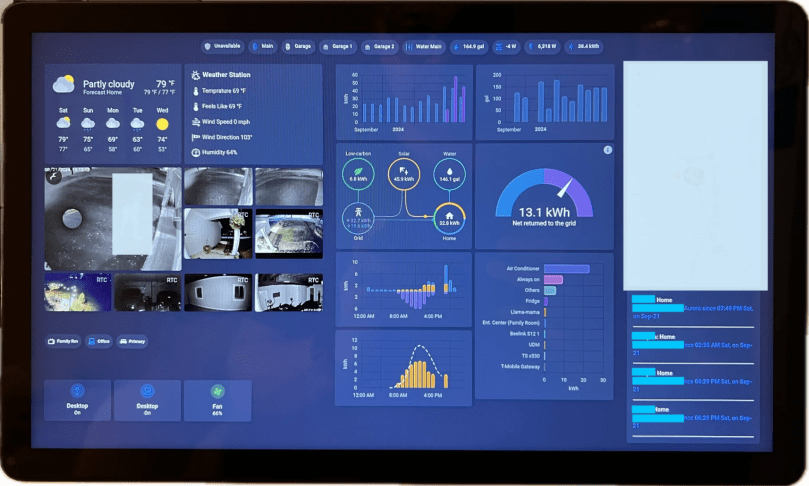
- Touchscreen display: I’m using a 15-inch FHD IPS touchscreen. This worked out great with Chromium in kiosk mode, and is good enough to display my Home Assistant dashboard.
- Home Assistant instance: You’ll need the IP address of your instance, as well as the path to your dashboard.
Installing Sudo
One thing I noticed after the installation was that the sudo command wasn’t included by default. I had to install it manually and add the user to the sudo group using:
su
apt update
apt install sudo
usermod -aG sudo
Setup Using ha-chromium-kiosk-setup.sh:
1. Downloading the Script
wget https://raw.githubusercontent.com/kunaalm/HA-Chromium-Kiosk/refs/heads/main/ha-chromium-kiosk-setup.sh
2. Running the Script
Once the script was downloaded, I gave it executable permissions and ran it. This is how I did it:
chmod +x ha-chromium-kiosk-setup.sh
./ha-chromium-kiosk-setup.sh
3. Configuration Prompts:
The script is designed to be interactive and need the following:
- Home Assistant IP Address: Needed, IP address of my Home Assistant instance.
- Home Assistant Port: Optional, defaults to 8123
- Dashboard Path: Optional, defaults to /lovelace/dashboard.
- Kiosk Mode Option: Optional, adds ?kiosk=true to the end of the URL.
Conclusion
Setting up a touchscreen device to run a Home Assistant dashboard using Chromium in kiosk mode on Debian turned out to be a great solution for my smart home setup. The script I have written automates most of the setup and removal, including the kiosk mode configuration and mouse pointer removal.
You can find the script and detailed documentation on GitHub: HA-Chromium-Kiosk.
